Objective
- Setup git repository in VSTS
- Build Continuous Integration (CI)/Continuous Deployment (CD) pipeline from scratch using VSTS
- Enable CI
- Create free web app service on Azure
- Trigger CD after successful CI
- End-to-end flow execution
Abstract
Continuous Integration (CI)/Continuous Deployment (CD) are widely used terms in the DevOps world. If you are new or don’t fully understand the buzzword DevOps then read my article DevOps, What, Why & How. Continuous Integration (CI) and Continuous Delivery(CD) enables and empowers any software delivery team in an organization to continuously deliver value to their end users.
Prerequisites
The application which you want to setup CI/CD pipeline for, that project code must be available in a code repository in VSTS (Visual Studio Team Services) read my article Beginning with git using VSTS can be helpful to set up a git repo from scratch using VSTS. Also, an Azure portal account is a must.
Creating a Build Definition
After successful Project and code setup in the git, you will see that your VSTS account will show code repository and a project like as shown below. Here, repository named TestProjects has an ASP.NET MVC application named WebApplication1.

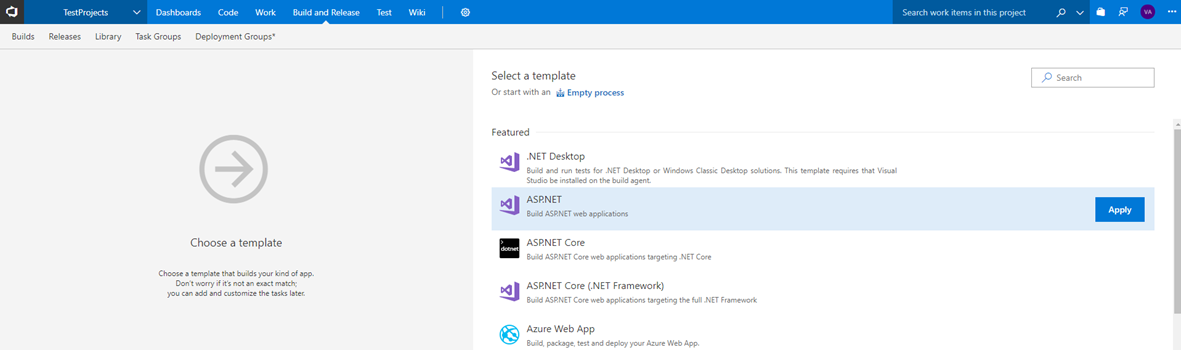
Click on “Set up build” and begin with selecting a template “ASP.NET” as shown in the image below, click Apply. You may want to choose a template which is suitable for your application.
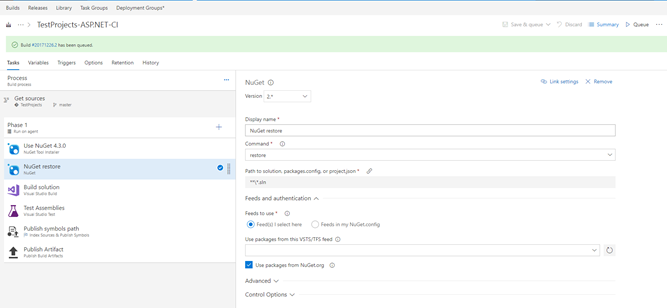
Setting the build tasks
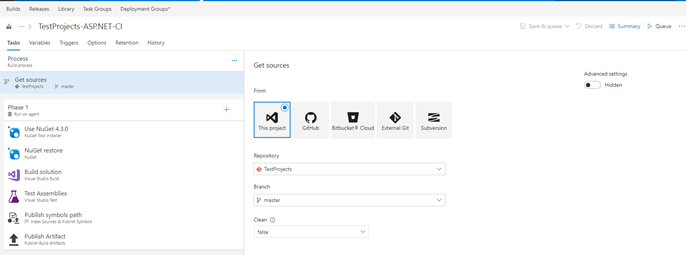
If not already open then open the Tasks tab. By default, build definition name will be <ProjectName>-<BuildTemplateName>-CI (you can change this to something else if you wish to) and Agent queue will be empty, which needs to be set to Hosted (in case of .NET) or Hosted 2017 (in case of .NET Core) as shown under Process blade in image below.

By default, build is being set up at the master branch on the project you initiated “set up build” from, which was TestProjetcs. You can verify this and change settings if needed using the “Get sources” blade as shown in the image below.
Build Template comes pre-configured with most of the tasks and hence you can review other tasks, but no changed would be required for successful execution from this step onwards (verified for MVC application), however, in your case, you may have to tweak some settings.
Queuing a CI build
To produce deployable artifacts, you need to submit a build of your code. To do so, click on Save & queue or if build definition is saved already then click on Queue which will ask for confirmation to kick-off a build as shown in the image below.
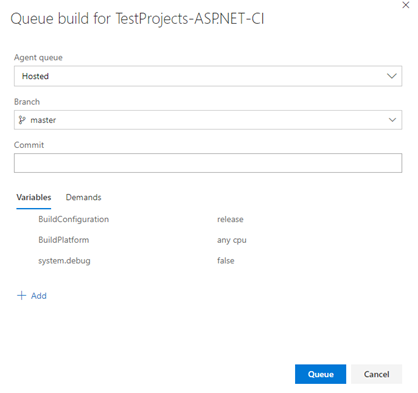
Click on Queue to initiate the process and you will notice that your screen will show that a Build #yyyymmdd.n have been queued.
To track the status of a build you can click on the build number link (as shown in the image above) and if everything was setup correctly then you will see “Build succeeded” as shown in the image below that all the build steps executed successfully. To explore more about each build step, you can click on a step link shown in the left-pane of the window.

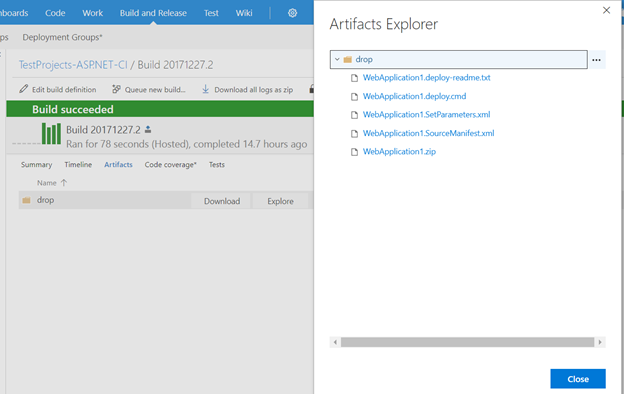
Exploring the Build Artifacts
CI build produces deployable artifacts and those can be seen via clicking on “Artifacts” link shown above Build details.
Setting up the Continuous Integration (CI)
Continuous Integration (CI) is when the code is being built on each check-in and that can be deployed to an environment. To set up this process, navigate to the build definition (click on Edit) and open the “Triggers” tab. By default, continuous integration is Disabled as shown in the image below.
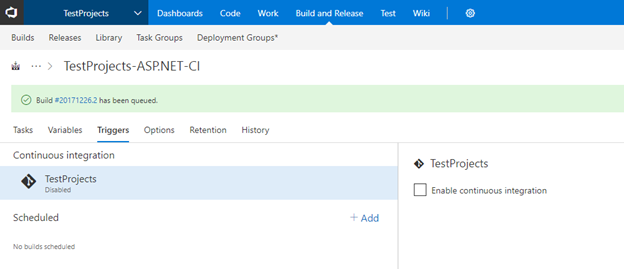
Click on “Enable continuous integration” to enable the CI for TestProjetcs and it will include master branch as the default setting.

Click “Save” to keep the changes to the build definition. Do not choose “Save and queue”
Continuous Integration (CI) in Action
Ensure that VSTS is open and you have Builds page open. Now switch to the Visual Studio and update the code of WebApplication1 under TestProjects repository
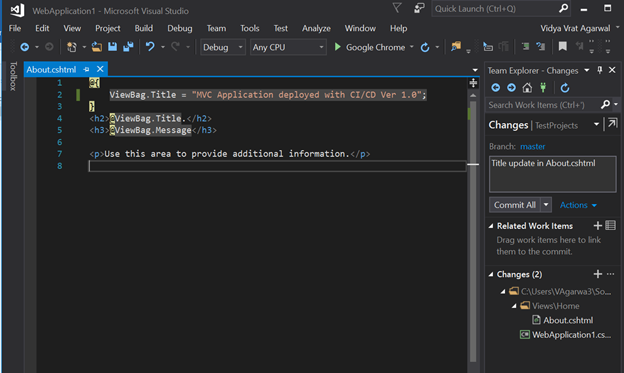
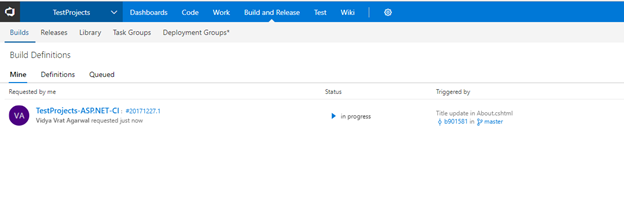
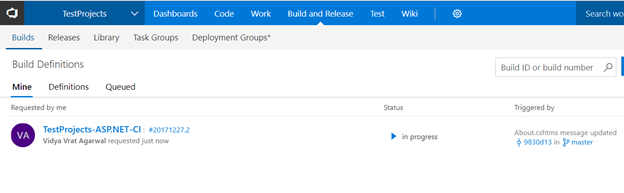
Click on “Commit All” to check-in the changes and push the code to master. Soon after that under the Builds in VSTS, you will notice that another build is kicked off and shows “in progress” status which was triggered by the commit “Title update in About.cshtml”.
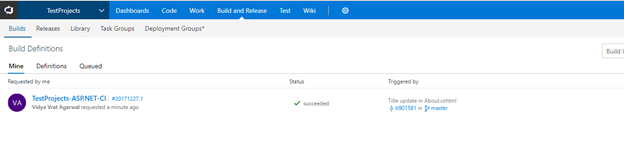
After successful build process, you will see “succeeded” status
Setting up the Azure Web App
Before creating a Release definition, an environment needs to be set up for deployment. An azure web app is a perfect choice to host the MVC application.
Login to the azure portal and create a web app “WebApplication1-dev” for dev environment and so other flavors (qa, uat, staging, and production etc.) can be created as needed.

By default, the Web app is created as an S1 (small) pricing tier, but you can create your own service plan and select Free pricing tier. Refer to my article Free Web App Hosting on Azure
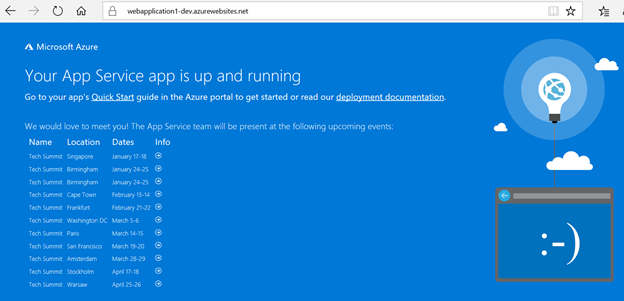
After successful Web app creation, it will be available at https://webapplication1-dev.azurewebsites.net/
Setting up the Continuous Delivery (CD)
Continuous Delivery (CD) is a software engineering approach in which teams produce deployable software which can be reliably released to an environment (dev, qa, uat, staging, and production) at any time.
To set up CD click on Build and Releases, then select Releases. Click on “New definition”.

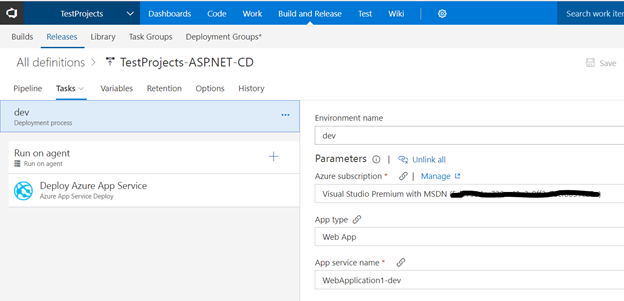
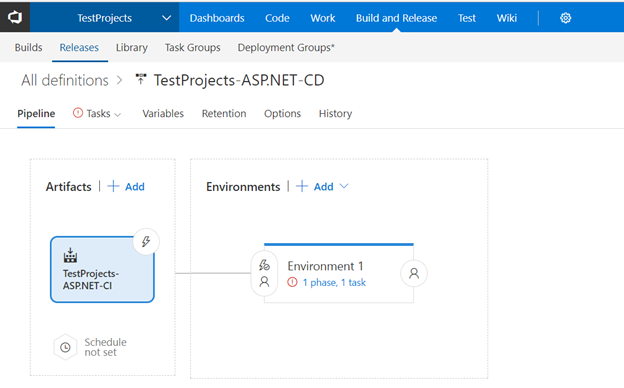
A “New Release Definition” will be created with the template for release as shown in the image below. Change the name of the release to “TestProjects-ASP.NET-CD”, then click on Artifacts and select TestProjects-ASP.NET-CI. Because, CI build artifacts will be deployed using Release dominion as CD process.

Next, it’s time to setup the Environment, rename it to dev and set values under “Tasks” tab as appropriate.
Creating a Release
After a Release definition has been set up, it’s time to deploy the CI build using the created release, this can be easily achieved by clicking on “Create release” link on the top-right corner.
“Create release” will summarize the setup of showing dev environment and created CI builds to choose from. By default, CI build will automatically kick off the release to the dev environment.
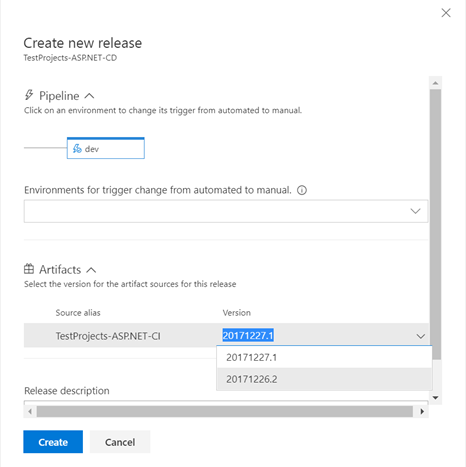
Select the latest build from the list of successful build versions and then click “Create” and notice that “Release-1” has been created.

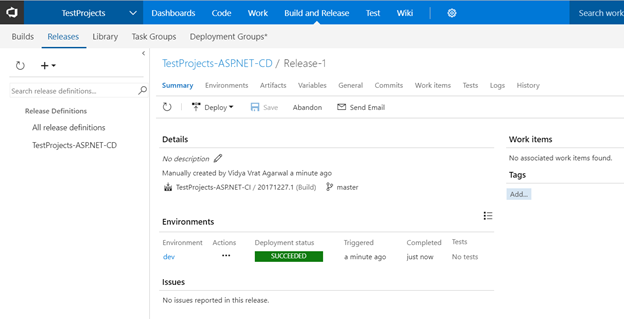
Click on the link “Release-1” to check the status which will be shown as “IN PROGRESS”

After few seconds Deployment status will be updated to “SUCCEEDED”
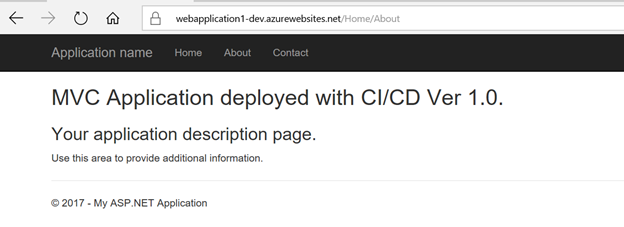
Now, if you access the https://webapplication1-dev.azurewebsites.net.WebApplication1-dev.azurewebsites.net then you will see that web application has been successfully deployed to Azure web app.
Setting up end-to-end automated CI/CD pipeline
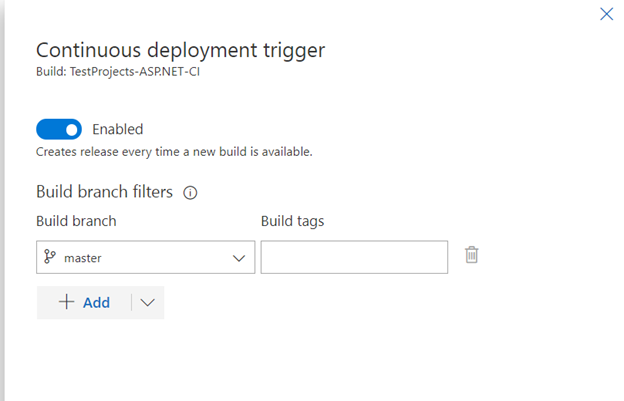
In the Release definition click on Artifacts trigger icon (lightning symbol) and enable the continuous deployment trigger and select the branch.
Now, go to Visual Studio and make some changes to the About.cshtml and check-in the code to master branch of WebApplication1 project. Which will then kickoff a CI Build.
Successful CI build will then kick-off the Release for CD to the dev environment.

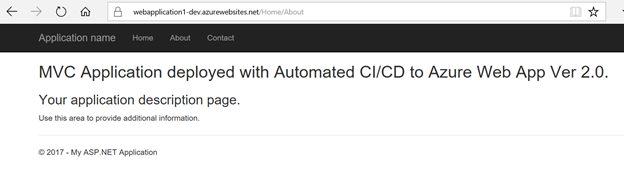
Upon successful execution of Release, the website will be deployed as shown below (see an updated message on the about.cshtml page).
This point onwards, whenever any code changes will be made using Visual Studio, then a CI build will spin and upon successful build execution, a Release (CD) will be created to deploy the web app.
Summary
CI/CD is the most widely used t the rm in industry today and helps in delivering continuous value delivery to the end users. VSTS and Azure offers a lot of great and powerful features to build CI/CD pipeline. This article has shown the process of building CI/CD pipeline from scratch and how to enable various triggers for CI/CD automation during this process.


 I am a hands-on architect with proven 19+ years of experience in architecting, designing, and developing distributed software solutions for large enterprises. At Microsoft, as a Principal Software Engineering Manager, I own the Platform team. I see software development as a craft, and I am a big proponent of software architecture and clean code discipline-n-practices. I like to see the bigger picture and make a broader impact. I was also a Microsoft MVP for past 7 years on Visual Studio and Dev Technologies I can be reached at vidya_mct@yahoo.com or twitter @dotnetauthor