Read Feature#1 Account Management in my previous article.
Abstract
Window Layout is a new Visual Studio 2015 feature related to developer’s productivity and ease of interaction with Visual Studio 2015 IDE. In previous version of Visual Studio developers were able to arrange windows as per their need but temporarily. Visual Studio 2015 extends this experience with some productivity enhancements.
Introduction
Window Layout is directly related to the way numerous windows are arranged and laid out in a Visual Studio IDE. IDE (Integrated Development Environment) is every developer’s tool for being creative, develop new things, being logical, fix issues, build and deploy various LOB (Line of Business) solutions etc.
Why Window Layout?
Different developer personality types like the windows to be arrange in specific way. Some like certain windows in the IDE and some like other windows. Some may like Pinned windows and some Tab styled.
Hence, Window Layout enables a developer’s to arrange the windows which they want and how they want and then save the layout for later use. Saved layout can be accessed from any machine on any device and applied to the IDE as long as that layout was saved to your Account Settings via Synchronization. Read Feature#1 Account Management in my previous article
So Window Layout enables you to arrange the IDE in a way you are most comfortable with and provides ease of use and productivity.
Which Windows are those?
Well, today Visual Studio 2015 stands mature and has a lot of windows which may appear in a developer’s screen wrapped into the IDE. For instance:
- Solution Explorer
- Team Explorer
- Server Explorer
- SQL Server Object Explorer
- Bookmark Window
- Call Hierarchy
- Class View
- Code Definition Window
- Object Browser
- Error List
- Output
- Task List
- Toolbox
- Class view
This list goes on and on, so let’s see the whole list via Visual Studio 2015 View menu.

Figure-1: Visual Studio 2015 View Menu
How to Save a Window Layout
Before you start saving a Window Layout, you to create one. Follow these steps:
1- Arrange windows (all which you work with mostly) in your desired way. For example as shown below: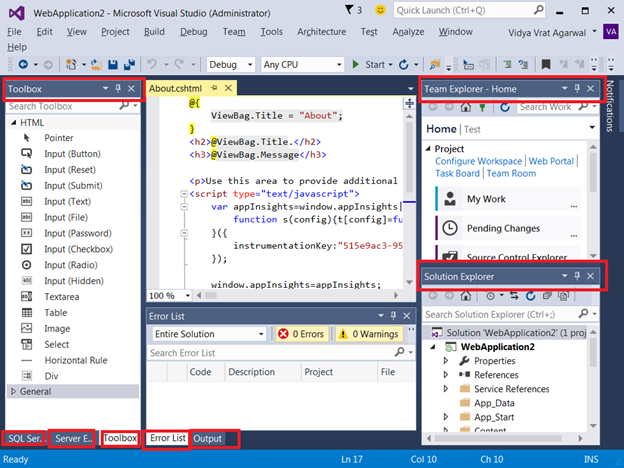
Figure-2: Arrange windows in Studio 2015
2- Now let’s save this Window Layout. Click on Window menu and choose “Save Window Layout”
Figure-3: Save Window Layout menus option
3- Name the Layout properly so you can recall from the name and click OK.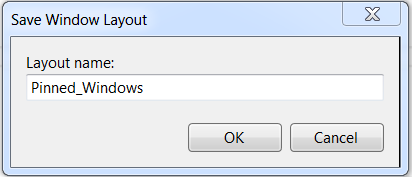
Figure-4: Naming a Layout
4- Now Layout is Saved and Synchronized with your Account Settings.
Reset Window Layout
Once you have saved the Layout and you want to test it, you have to reset the layout to default layout which Visual Studio IDE brings to you.
Go to Window menus and click on “Reset Window Layout”
Figure-5: Reset Window Layout menus option
Once you click on this option, Visual Studio will prompt you to confirm that you want to restore the default window layout. Click on Yes.
Figure-6: Confirmation dialog to Reset Window Layout
Now, Your IDE will be re-arranged to default layout as shown in the image below. Which could be the one you are having right now in your Visual Studio IDE.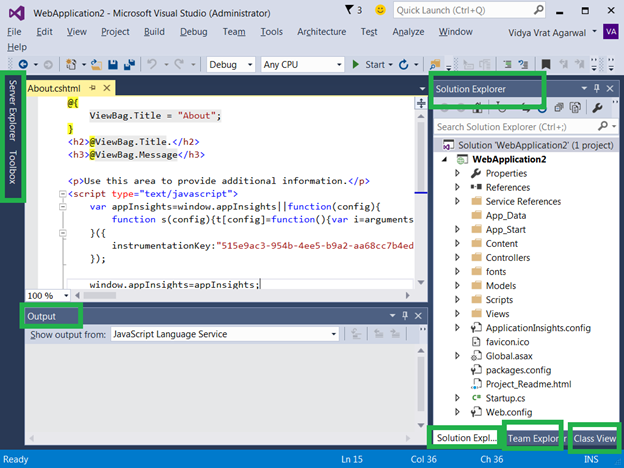
Figure-7: Default layout after Reset of the layout
Applying Saved Window Layout
To apply your saved Window Layout, go to Window menus and click on “Apply Window Layout” and choose one of the previously saved Window Layout. I have created and named my layout as “Pinned_Windows”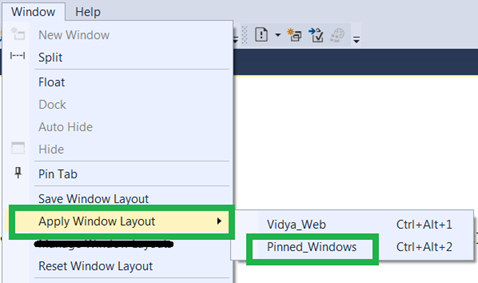
Figure-8: Apply Window Layout menu option
Click on “Pinned_Windows” layout and Visual Studio will show a confirmation dialog, click OK
Figure-9: Confirmation to Apply saved Window Layout
Now your layout will change to what you have saved and IDE will appear as shown below.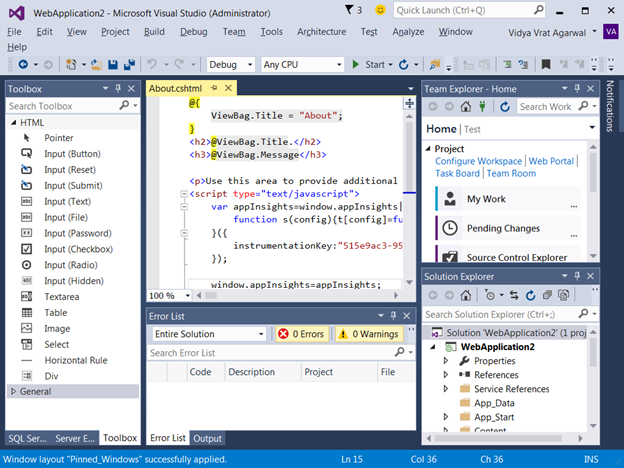
Figure-10: Saved layout applied
Manage Window Layout
As you can imagine you may end up with creating and cleaning up layout as per your needs. Hence, it become very important to manage the layouts which are created and available in your Account Settings.
You can easily manage the layouts via Window menu and “Manage Window Layout” option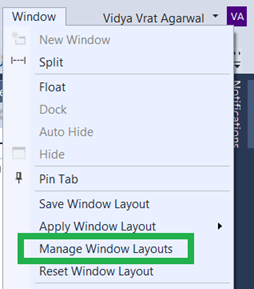
Figure-11: Manage Window Layouts menu option
Once you click on it, a dialog will open and allow you to Rename, Delete etc.
Figure-12: Manage Window Layouts dialog
Summary
Custom Window Layout in Visual Studio 2015 is a brand new way of arranging the windows in the IDE and saving the layout. After saving the layout, it’s also easy to manage and restore the window arrangements. This feature certainly helps the developers to feel comfortable with their window arrangements and continue to be productive across the devices using Visual Studio 2015.


 I am a hands-on architect with proven 19+ years of experience in architecting, designing, and developing distributed software solutions for large enterprises. At Microsoft, as a Principal Software Engineering Manager, I own the Platform team. I see software development as a craft, and I am a big proponent of software architecture and clean code discipline-n-practices. I like to see the bigger picture and make a broader impact. I was also a Microsoft MVP for past 7 years on Visual Studio and Dev Technologies I can be reached at vidya_mct@yahoo.com or twitter @dotnetauthor